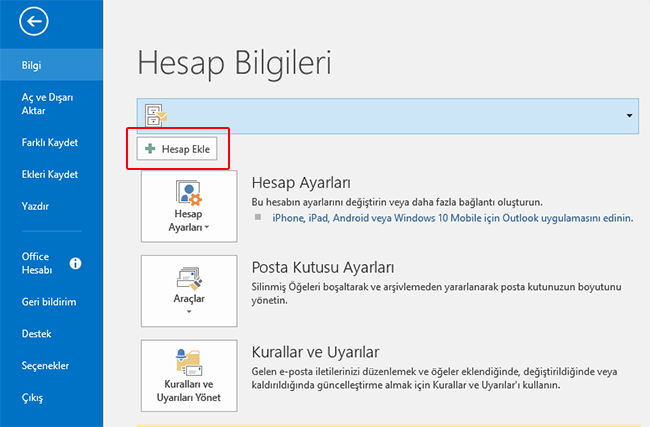
1- Click the Add Account button from the File Tab.
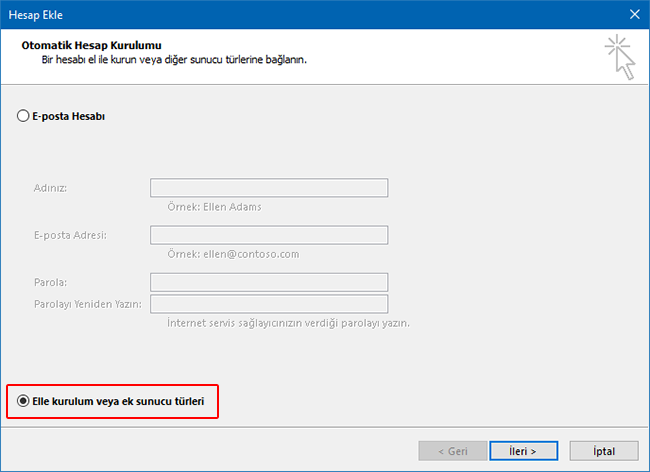
2- In the window that opens, let's click on the "Manual installation or additional installation process" option.
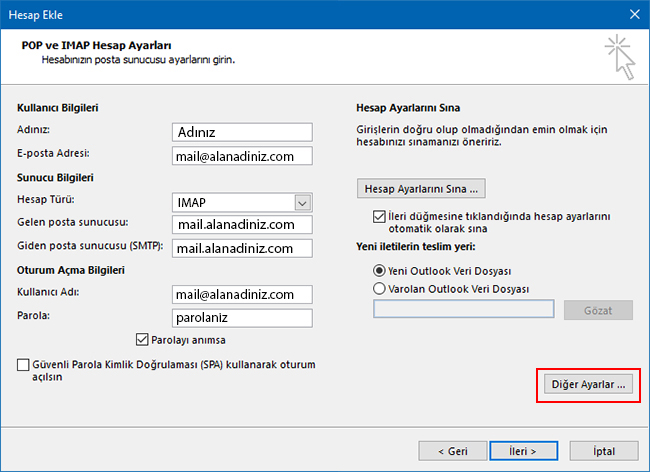
3- In the window that opens, select POP or IMAP.

4- Opening You need to fill in the relevant fields in the window according to your own domain name. After the process is completed, let's proceed from the "Other Settings..." option.
5- Click the Outgoing Server tab in the newly opened window and select the marked button
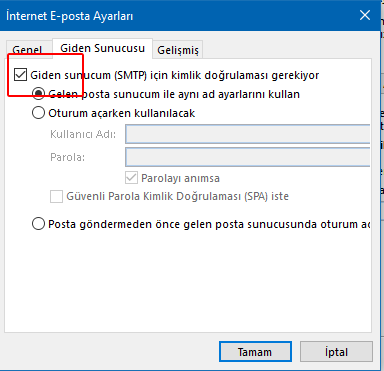
6- From the "Advanced" option at the top, set it as follows required. After completing all the steps, click the "OK" button.


